

CustomTkinter is a powerful Python UI library that modernizes the traditional Tkinter framework with contemporary widgets, themes, and styling options.
This library allows developers to create visually appealing applications while maintaining the simplicity and cross-platform compatibility that made Tkinter popular.
This tutorial will guide you through CustomTkinter from basic concepts to advanced techniques, providing practical examples along the way.
Getting Started
Installation
Before diving into CustomTkinter, you need to install it. CustomTkinter is available on PyPI and can be installed using pip:
pip install customtkinter
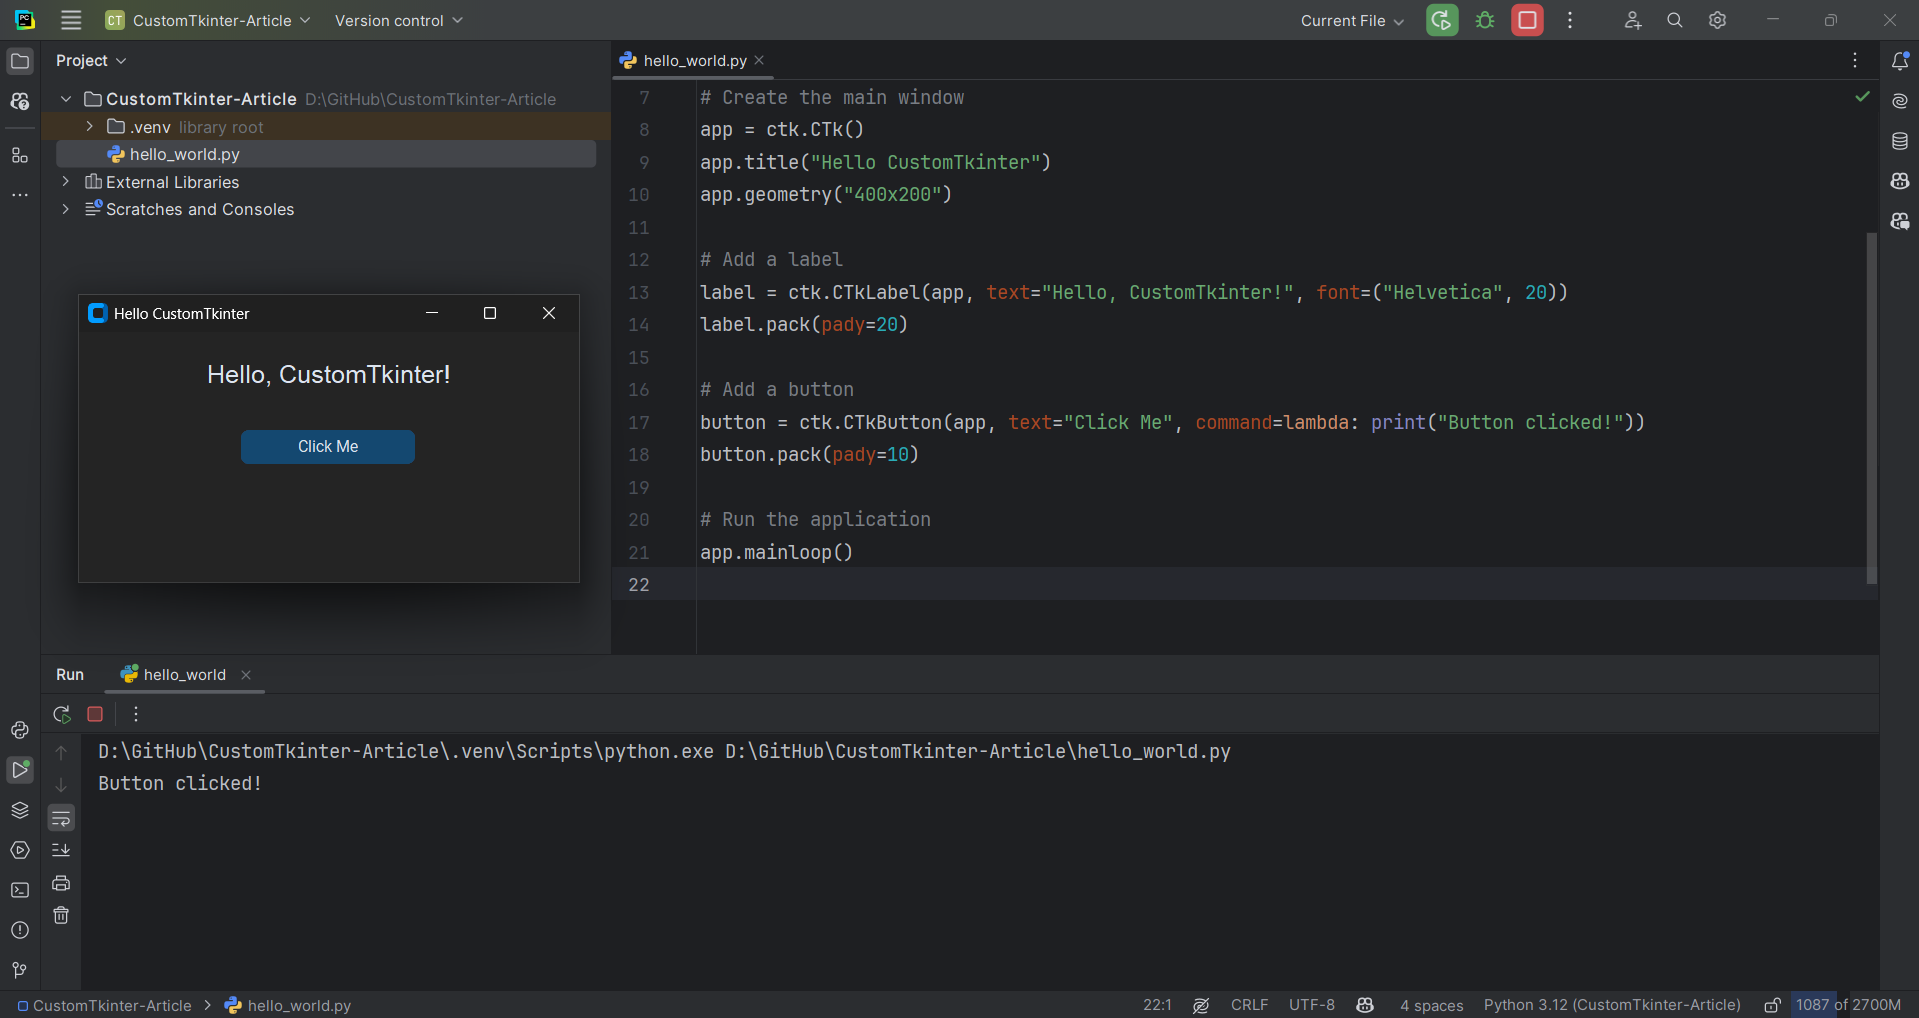
First Application
Let's create a simple "Hello World" application to get started:
import customtkinter as ctk

# Set appearance mode and default color theme
ctk.set_appearance_mode("dark")
ctk.set_default_color_theme("blue")

# Create the main window
app = ctk.CTk()
app.title("Hello CustomTkinter")
app.geometry("400x200")

# Add a label
label = ctk.CTkLabel(app, text="Hello, CustomTkinter!", font=("Helvetica", 20))
label.pack(pady=20)

# Add a button
button = ctk.CTkButton(app, text="Click Me", command=lambda: print("Button clicked!"))
button.pack(pady=10)

# Run the application
app.mainloop()
This simple code creates a window with a label and a button. When you click the button, "Button clicked!" will be printed to the console:
Core Concepts
Understanding the CTk Class
The CTk class is the CustomTkinter equivalent of Tkinter's Tk class. It creates the main window of your application. You can set the title, size, and other properties of your window using methods like title() and geometry().
app = ctk.CTk()
app.title("My Application")
app.geometry("800x600")  # Width x Height
app.resizable(width=True, height=True)  # Allow resizing
Event Loop
Just like in Tkinter, CustomTkinter applications run in an event loop. The event loop is started by calling the mainloop() method on your application window:
app.mainloop()
This method starts the event loop, which listens for user interactions (like button clicks) and updates the UI accordingly.
Widgets and Masters
In CustomTkinter, widgets (UI elements like buttons, labels, etc.) are created by specifying a "master" or parent widget.
The master is the container that will hold the widget. For top-level widgets, the master is usually the main window.
# The app is the master for this button
button = ctk.CTkButton(master=app, text="Click Me")
Basic Widgets
CTkLabel
Labels display text or images:
label = ctk.CTkLabel(
    master=app,
    text="This is a label",
    font=("Helvetica", 16),
    text_color="white",
    corner_radius=8
)
label.pack(pady=10)
CTkButton
Buttons perform actions when clicked:
def button_callback():
    print("Button clicked")

button = ctk.CTkButton(
    master=app,
    text="Click Me",
    command=button_callback,
    width=120,
    height=32,
    border_width=0,
    corner_radius=8,
    hover=True
)
button.pack(pady=10)
CTkEntry
Entry widgets allow users to input text:
entry = ctk.CTkEntry(
    master=app,
    placeholder_text="Type something...",
    width=200,
    height=30,
    border_width=2,
    corner_radius=10
)
entry.pack(pady=10)

# To get the text from the entry:
def get_text():
    text = entry.get()
    print(f"Entry contains: {text}")

get_button = ctk.CTkButton(master=app, text="Get Text", command=get_text)
get_button.pack(pady=5)
CTkCheckBox
Checkboxes allow users to make binary choices:
checkbox_var = ctk.StringVar(value="off")

def checkbox_event():
    print(f"Checkbox is {checkbox_var.get()}")

checkbox = ctk.CTkCheckBox(
    master=app,
    text="Check me",
    command=checkbox_event,
    variable=checkbox_var,
    onvalue="on",
    offvalue="off"
)
checkbox.pack(pady=10)
CTkRadioButton
Radio buttons allow users to select one option from a group:
radio_var = ctk.IntVar(value=0)

def radiobutton_event():
    print(f"Selected option: {radio_var.get()}")

radio1 = ctk.CTkRadioButton(
    master=app,
    text="Option 1",
    command=radiobutton_event,
    variable=radio_var,
    value=1
)
radio1.pack(pady=5)

radio2 = ctk.CTkRadioButton(
    master=app,
    text="Option 2",
    command=radiobutton_event,
    variable=radio_var,
    value=2
)
radio2.pack(pady=5)
CTkSwitch
Switches provide a modern alternative to checkboxes:
switch_var = ctk.StringVar(value="off")

def switch_event():
    print(f"Switch is {switch_var.get()}")

switch = ctk.CTkSwitch(
    master=app,
    text="Toggle me",
    command=switch_event,
    variable=switch_var,
    onvalue="on",
    offvalue="off"
)
switch.pack(pady=10)
CTkSlider
Sliders allow users to select a value from a range:
def slider_event(value):
    print(f"Slider value: {value}")

slider = ctk.CTkSlider(
    master=app,
    from_=0,
    to=100,
    command=slider_event,
    width=200
)
slider.pack(pady=10)
slider.set(50)  # Set initial value
CTkProgressBar
Progress bars visualize the completion status of a task:
progress_bar = ctk.CTkProgressBar(
    master=app,
    width=200,
    height=15,
    corner_radius=5
)
progress_bar.pack(pady=10)
progress_bar.set(0.5)  # Set to 50%
Layouts and Containers
CTkFrame
Frames are containers that group and organize other widgets:
This article is for paid members only
To continue reading this article, upgrade your account to get full access.
Subscribe NowAlready have an account? Sign In