

Have you ever wanted to crowdsource environmental data from the public—without requiring them to log into a website or download an app?
In this guide, we’ll show you how to build a powerful Email Environmental Monitoring System using FastAPI and Postmark that lets users submit data just by sending an email.
This project automates everything: parsing emails, extracting GPS data from images, storing the info in a database, and even sending confirmation emails.
Let’s dive in. 🌱
What You’ll Build
A FastAPI-based web service that:
- Accepts environmental data via email.
- Extracts GPS coordinates from image attachments.
- Stores everything in an SQLite database.
- Provides a modern web UI for viewing and filtering submissions.
- Sends confirmation emails using Postmark.
Email Environmental Monitoring
Full source code available at: https://github.com/nunombispo/EmailEnvironmentalMonitoring-Postmark

This book offers an in-depth exploration of Python's magic methods, examining the mechanics and applications that make these features essential to Python's design.
What Is FastAPI?
FastAPI is a modern, high-performance web framework for building APIs with Python 3.7+ based on standard Python type hints.
Its key advantages are:
Speed & Performance: FastAPI is built on top of Starlette for the web parts and Pydantic for data validation. It is one of the fastest Python frameworks available.
Developer Productivity: Automatic data validation and parsing using Python type hints means you write less boilerplate. FastAPI generates interactive API documentation (Swagger UI and ReDoc) out of the box, so you can explore and test your endpoints immediately.
Standards-Based: It fully supports the OpenAPI (formerly Swagger) specification and JSON Schema. This makes it easy to integrate with other tools, generate clients, and ensure your API contracts are explicit.
Asynchronous Support: Native support for async/await lets you handle large numbers of concurrent requests (e.g., for I/O-bound tasks like database queries or calling external services) with minimal effort.
In our project, FastAPI powers both the webhook endpoint that receives emails from Postmark and the web interface where users can browse submissions (with Jinja2)—providing fast, reliable routing and automatic documentation.
If you want to learn more about FastAPI and Jinja2, check out some of my other articles:
https://developer-service.blog/fastapi-best-practices-a-condensed-guide-with-examples/
https://developer-service.blog/building-a-load-balancer-with-fastapi/
https://developer-service.blog/how-to-build-dynamic-frontends-with-fastapi-and-jinja2/
What Is Postmark?
Postmark is a cloud-based email delivery service focused on transactional email—messages like password resets, notifications, and, in our case, inbound data submissions.
Its main features include:
Inbound and Outbound Email:
- Inbound: You can configure a custom domain or mailbox so that any email sent to it triggers a webhook to your application. That webhook delivers a JSON payload with all the email details (sender, subject, body, attachments).
- Outbound: Postmark’s API lets you send transactional emails (confirmations, alerts) reliably, with deliverability tracking and analytics.
Attachment Handling: Incoming attachments are base64-encoded in the webhook payload, so you receive everything in a single, easy-to-parse JSON object.
Reliability & Deliverability: Postmark’s infrastructure is optimized for transactional email, ensuring high delivery rates and honouring email standards (DKIM, SPF).
Custom Headers: You can use mailbox hashes (like mail+01@mail.com, where '01' is the hash), which enables features like our priority-based processing.
In this tutorial, Postmark provides the inbound webhook that turns an ordinary email into a structured HTTP request—complete with attachments and metadata—so our FastAPI app can ingest and process environmental observations.

Mug Trust Me Prompt Engineer Sarcastic Design
A sarcastic "prompt badge" design coffee mug, featuring GPT-style neural network lines and a sunglasses emoji.
Perfect for professionals with a sense of humor, this mug adds a touch of personality to your morning routine.
Ideal for engineers, tech enthusiasts, and anyone who appreciates a good joke.
Great for gifting on birthdays, holidays, and work anniversaries.
Setup Postmark
To configure Postmark, just follow these steps after login or creating a new account at https://postmarkapp.com/:
First, create a new server:
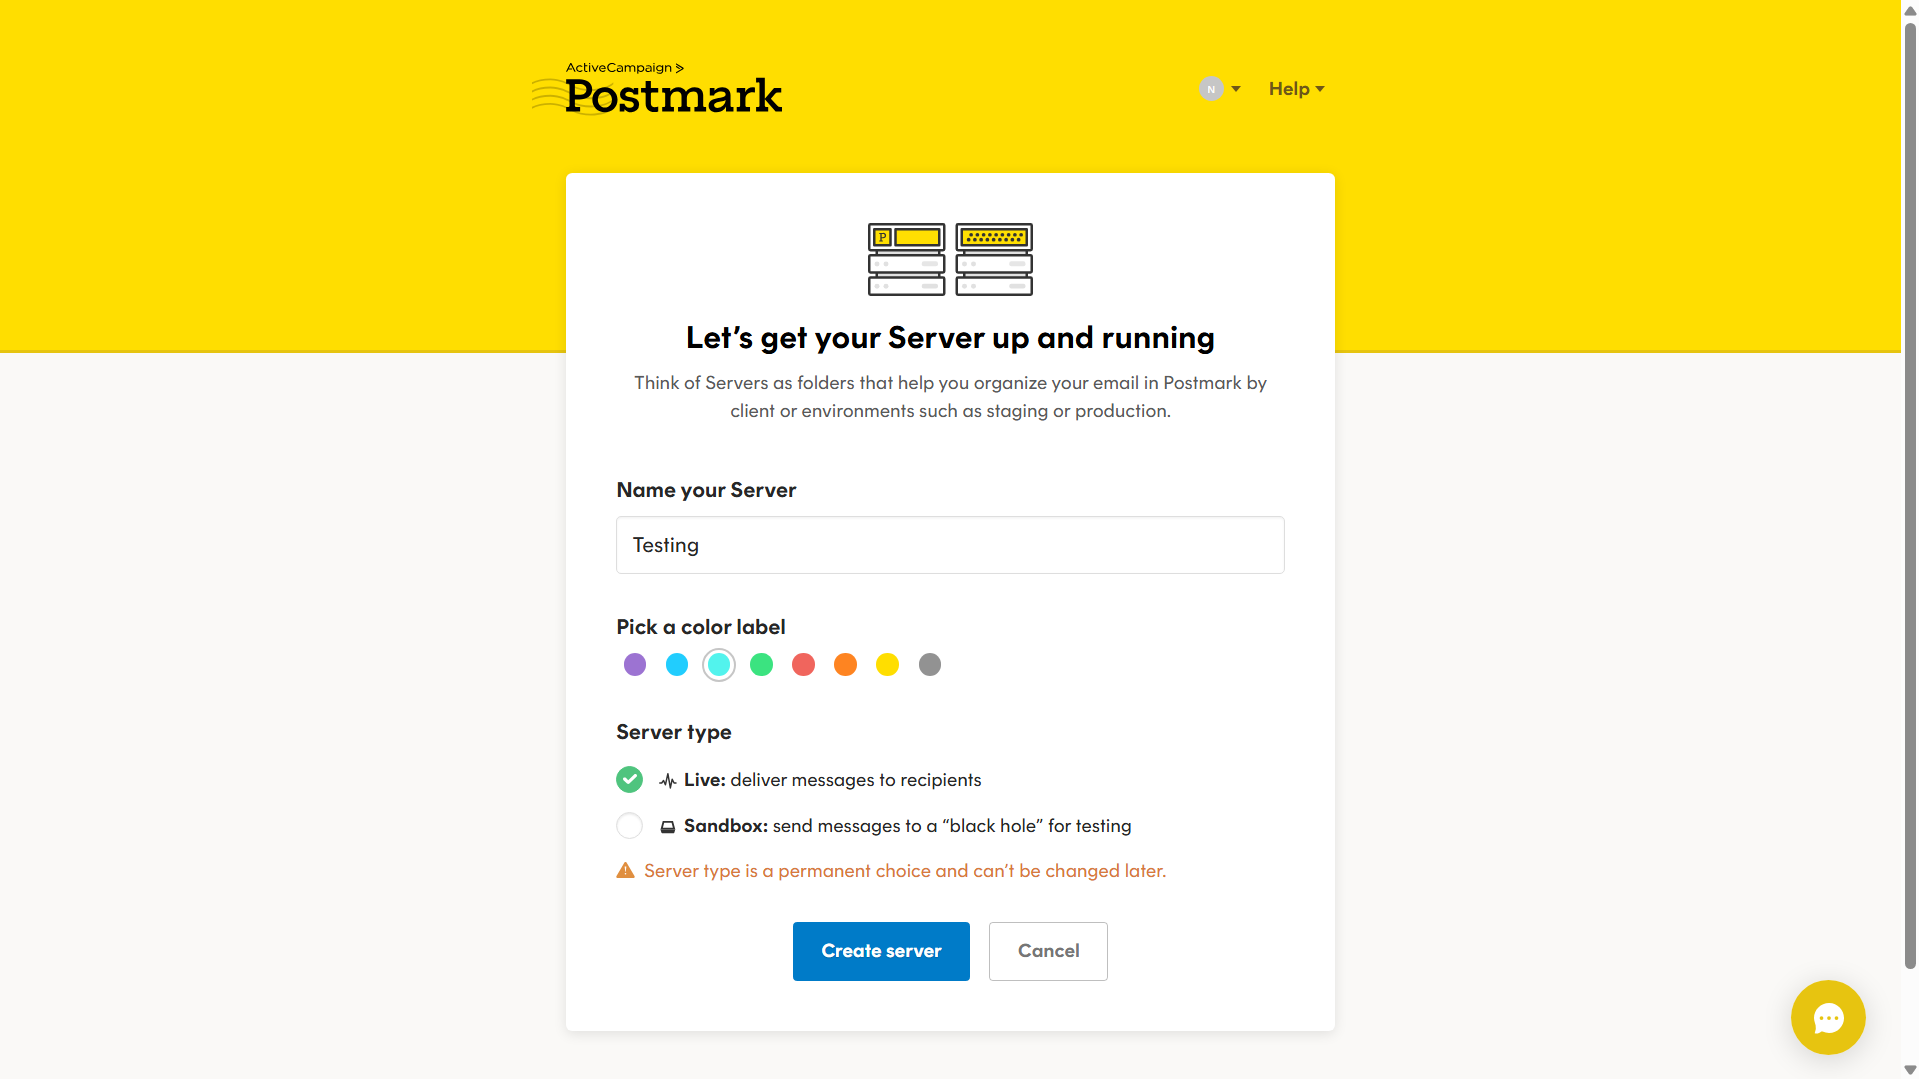
It will create a server with 3 streams:
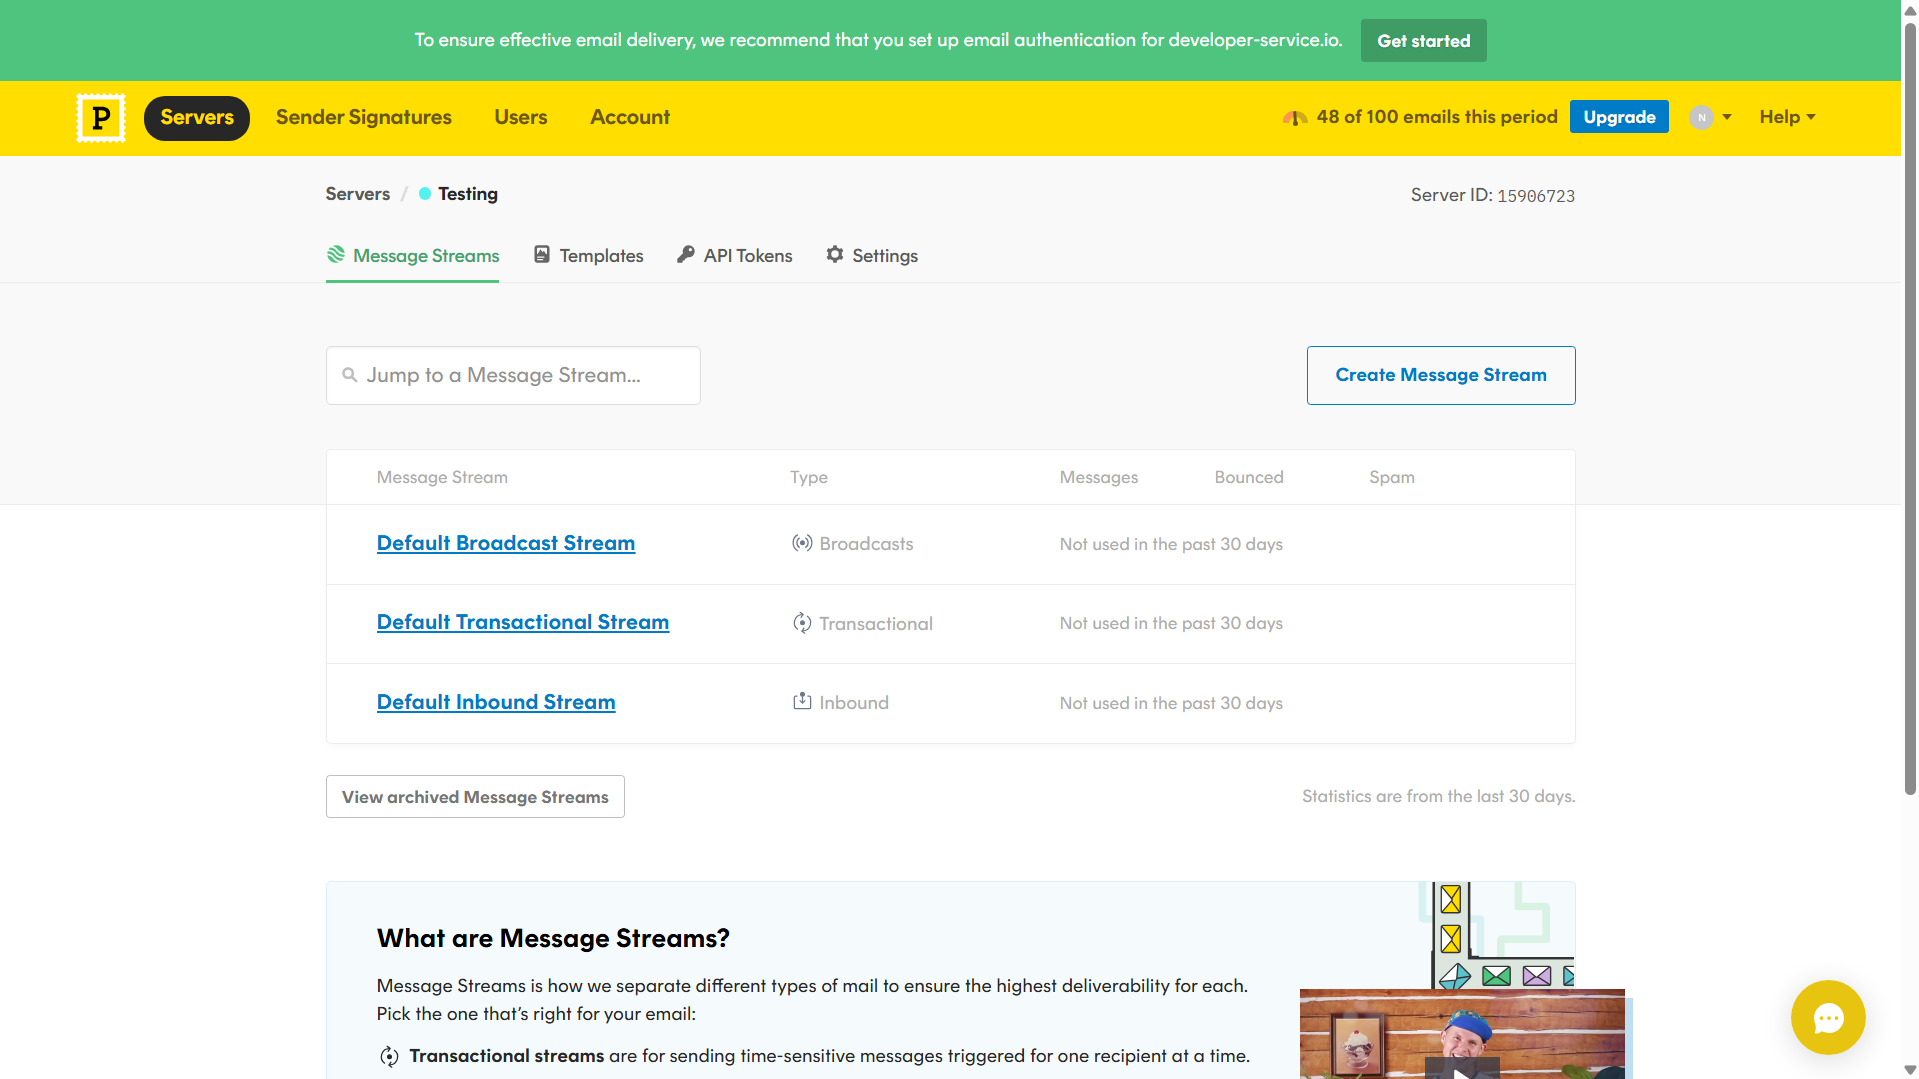
Go to the 'Default Inbound Stream->Setup Instructions':
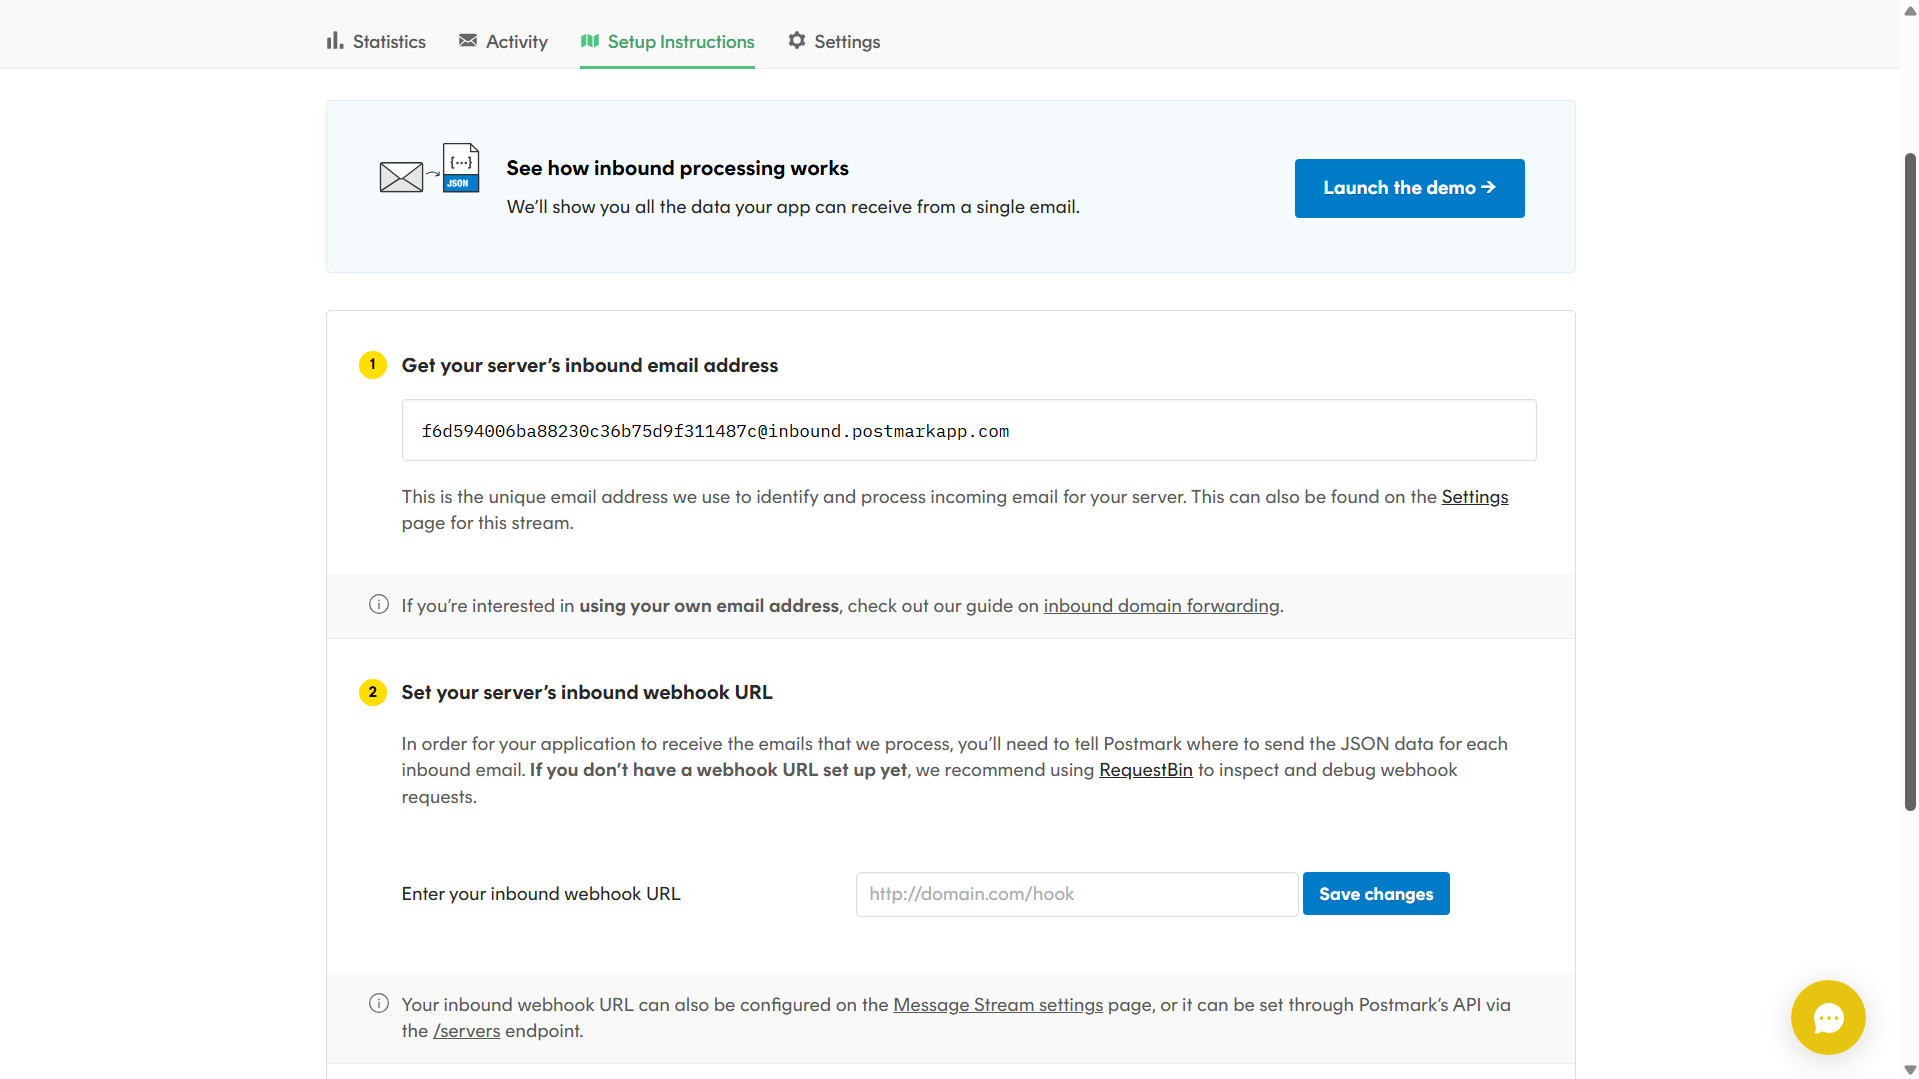
Here make note of the inbound email address, you can send emails to this address or configure in your email client a forward from other email to this mailbox, for more info check the docs.
Also fill in your applications inbound webhook URL where Postmark will send the processed JSON for your application.
Finally, goto 'Default Transactional Stream->Settings':
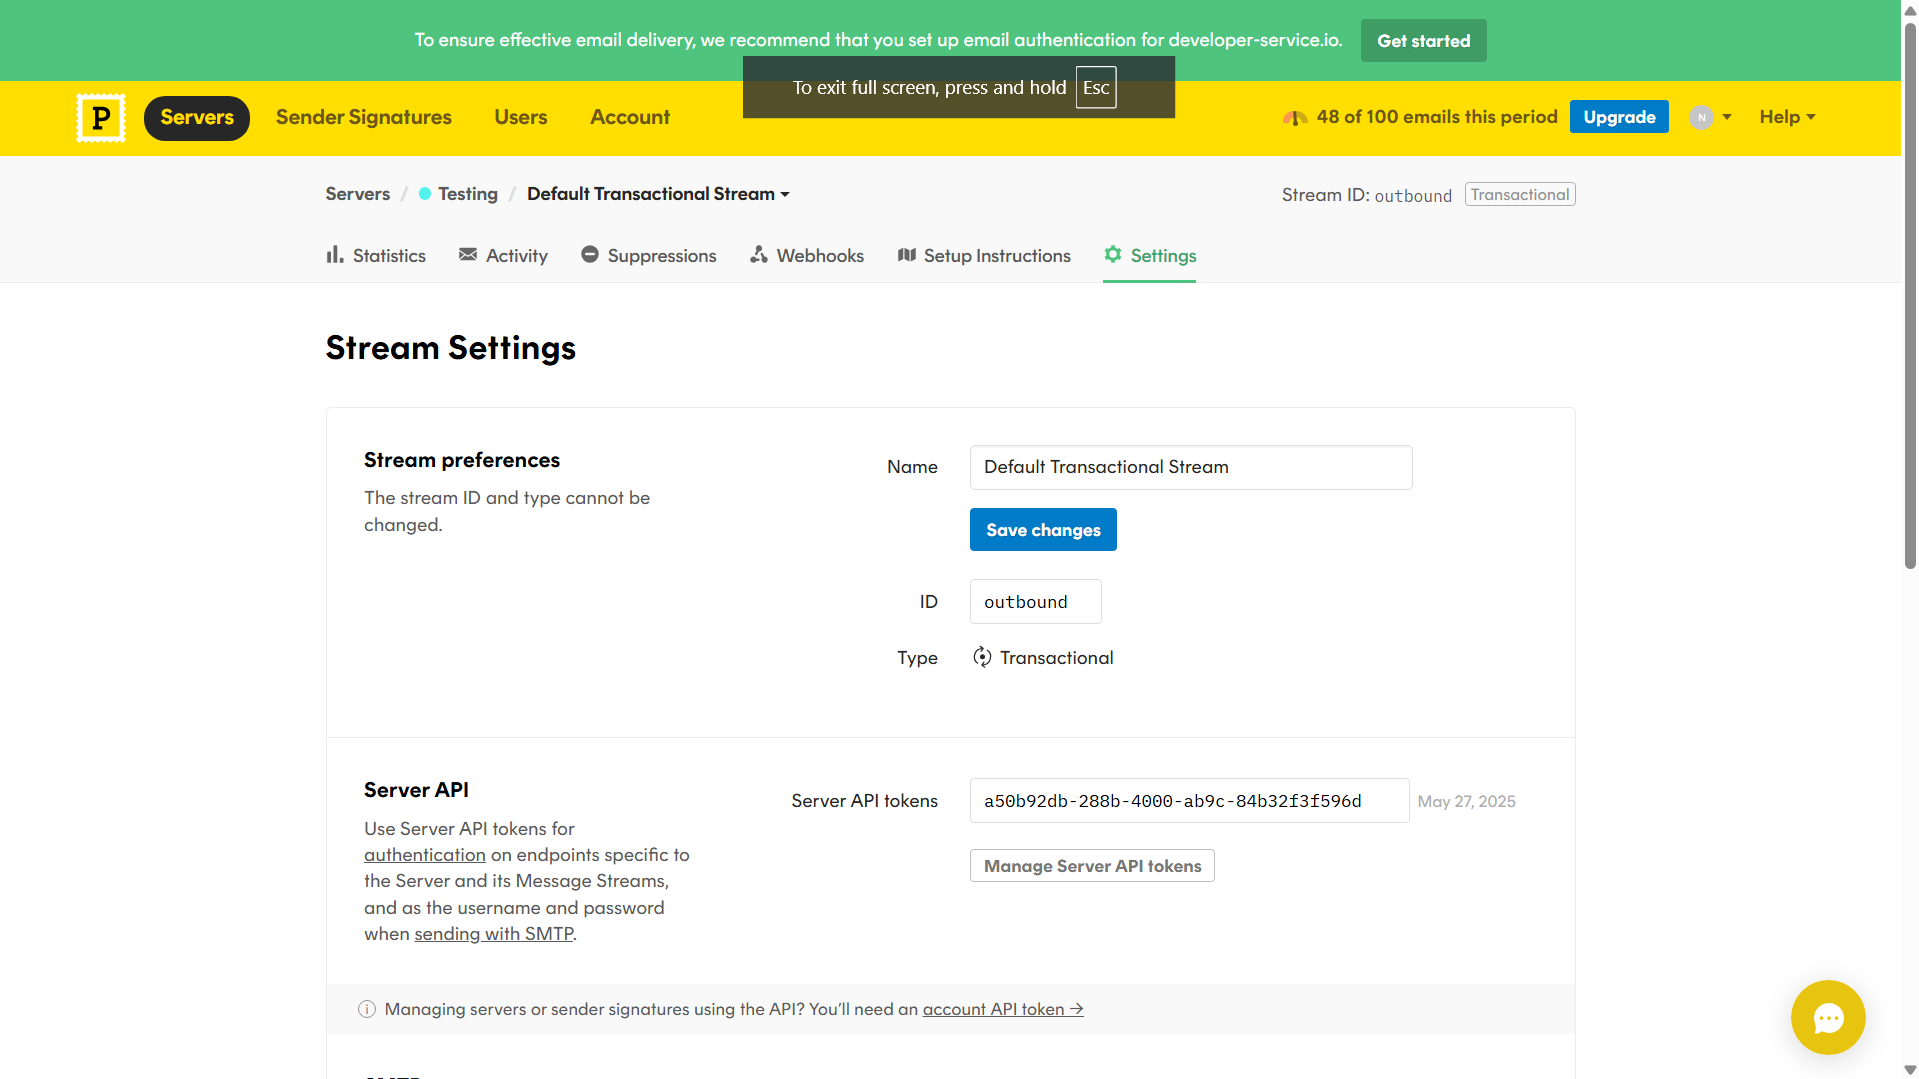
And get the Server API key for sending emails with Postmark.
Step 0: Create your project scaffold
mkdir email_monitoring
cd email_monitoring
python -m venv venv
source venv/bin/activate         # Windows: venv\Scripts\activate
Now inside email_monitoring/, you’ll have this structure by the end:
email_monitoring/
├── database.py
├── utils.py
├── main.py
├── requirements.txt
└── templates/
    └── emails.html
Step 1: Define dependencies
Create requirements.txt:
fastapi
uvicorn
pydantic
Pillow
exif
jinja2
postmarker                         # for sending emails
Install them:
pip install -r requirements.txt
Step 2: Build database.py
We’ll use plain sqlite3 to store email metadata and attachments.
# database.py
import sqlite3
from datetime import datetime, UTC
import hashlib
import time

def get_db_connection():
    conn = sqlite3.connect('email_monitoring.db')
    conn.row_factory = sqlite3.Row
    return conn

def init_db():
    conn = get_db_connection()
    c = conn.cursor()

    # Create emails table
    c.execute('''
        CREATE TABLE IF NOT EXISTS emails (
            id INTEGER PRIMARY KEY AUTOINCREMENT,
            from_email TEXT,
            from_name TEXT,
            to_email TEXT,
            to_name TEXT,
            to_mailbox_hash TEXT,
            subject TEXT,
            text_body TEXT,
            html_body TEXT,
            date_received TIMESTAMP,
            submission_hash TEXT UNIQUE
        )
    ''')

    # Create attachments table
    c.execute('''
        CREATE TABLE IF NOT EXISTS attachments (
            id INTEGER PRIMARY KEY AUTOINCREMENT,
            email_id INTEGER,
            name TEXT,
            content_type TEXT,
            content_length INTEGER,
            content BLOB,
            latitude REAL,
            longitude REAL,
            altitude REAL,
            FOREIGN KEY (email_id) REFERENCES emails (id)
        )
    ''')

    conn.commit()
    conn.close()

def save_email(email_data):
    conn = get_db_connection()
    c = conn.cursor()

    # Generate a unique hash for the submission
    submission_hash = hashlib.sha256(
        f"{email_data.get('from_email')}{email_data.get('subject')}{time.time()}".encode()
    ).hexdigest()[:12]  # Using first 12 characters for readability

    # Insert email data
    c.execute('''
        INSERT INTO emails (
            from_email, from_name, to_email, to_name, to_mailbox_hash,
            subject, text_body, html_body, date_received, submission_hash
        ) VALUES (?, ?, ?, ?, ?, ?, ?, ?, ?, ?)
    ''', (
        email_data.get('from_email'),
        email_data.get('from_name'),
        email_data.get('to_email'),
        email_data.get('to_name'),
        email_data.get('to_mailbox_hash'),
        email_data.get('subject'),
        email_data.get('text_body'),
        email_data.get('html_body'),
        datetime.now(UTC),
        submission_hash
    ))

    email_id = c.lastrowid

    conn.commit()
    conn.close()
    return email_id, submission_hash

def save_attachment(attachment_data):
    conn = get_db_connection()
    c = conn.cursor()

    # Insert attachment data
    c.execute('''
        INSERT INTO attachments (
            email_id, name, content_type, content_length,
            content, latitude, longitude, altitude
        ) VALUES (?, ?, ?, ?, ?, ?, ?, ?)
    ''', (
        attachment_data.get('email_id'),
        attachment_data.get('name'),
        attachment_data.get('content_type'),
        attachment_data.get('content_length'),
        attachment_data.get('content'),
        attachment_data.get('latitude'),
        attachment_data.get('longitude'),
        attachment_data.get('altitude')
    ))

    attachment_id = c.lastrowid

    conn.commit()
    conn.close()
    return attachment_id
Explanation:
- init_db() ensures the two tables exist.
- save_email() writes the core email data, generates a short submission_hash, and returns email_id.
- save_attachment() writes each file blob plus any GPS metadata.
Step 3: Extract GPS info in utils.py
We’ll use Pillow + piexif to pull EXIF GPS data.
This article is for paid members only
To continue reading this article, upgrade your account to get full access.
Subscribe NowAlready have an account? Sign In