Building a Weather Home Screen on a Reflective LCD (MicroPython, ESP32-S3)
You know the moment. The board arrives. You flash MicroPython. You run print("hello") and the serial console cheers. Then try the display, the whole reason you bought this thing, and… nothing. Or worse: a white rectangle that flickers once and dies.
I've been there more times than I'd like to admit. The Waveshare ESP32-S3 4.2" Reflective LCD is a gorgeous panel for a weather station: sunlight-readable, low power, no backlight glow at 2 a.m. But it's also a niche combo, ESP32-S3 plus an ST7305 controller on SPI, and the ecosystem doesn't hand you an import display and walk away.
This post is a weekend walkthrough to get the ST7305 driver working, connect WiFi, pull live weather from Open-Meteo, and have something useful on the display by Sunday.
All the source code is in this repository, flat Python files, no framework. Copy them to the board, add your WiFi credentials, reset.
Just want it working? Quiet Forecast is ready-to-flash multi-screen firmware for this board. Everything below is the free weekend walk-through if you'd rather build it yourself.
Friday night: pixels
Clone the repo, you don't type st7305.py from scratch unless you want to. The sections below explain how the driver works;
Why this board
Reflective LCDs are not TFTs. Everything is monochrome, so design for contrast and big type, not gradients. That constraint is a feature for a wall or desk display: readable in daylight, pleasant at night, low power.
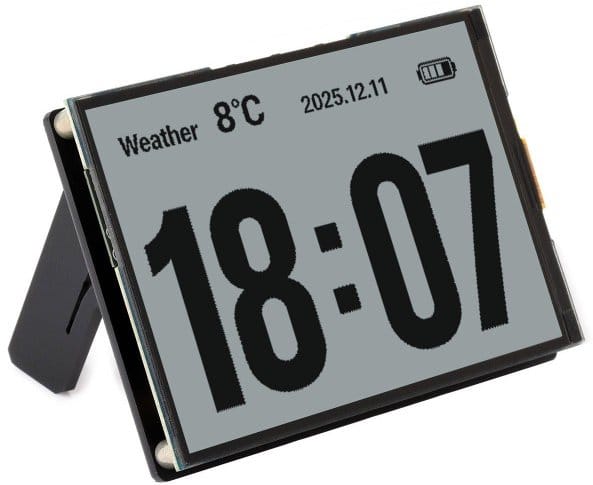
Most tutorials for this kit stop at Arduino examples. There is no official MicroPython driver for the ST7305 on this board.
Building st7305.py
So st7305.py is a port. The init sequence, register values, delays, SPI command/data toggling, comes straight from the vendor BSP (Board Support Package). The pixel format does not.
Reflective panels pack pixels in a peculiar layout: four vertical rows are interleaved in each byte column. Getting (x, y) wrong doesn't produce a shifted image; it produces static. The core function is _rlcd_pixel(), which maps logical coordinates into that buffer layout, with Y inverted to match the panel's scanning direction:
def _rlcd_pixel(buf, h4, height, width, x, y, color):
    inv_y = height - 1 - y
    block_y = inv_y >> 2
    local_y = inv_y & 3
    byte_x = x >> 1
    local_x = x & 1
    idx = byte_x * h4 + block_y
    mask = 1 << (7 - ((local_y << 1) | local_x))
    if color:
        buf[idx] = buf[idx] | mask
    else:
        buf[idx] = buf[idx] & ~mask
On top of that buffer we implement the primitives every UI needs:
fill,pixel,hline,rect,circletextviaframebuf8×8 glyphs, scaled to 8 / 16 / 24 / 32 px heightsrefresh(), which push the full buffer over SPI in chunks (_SPI_CHUNK = 4092) to avoid allocation spikes
display.py wraps this in a small Display class: margins, header/footer heights, and content_area() so pages never hard-code like y = 48. The ST7305 import is deferred inside _create_panel() to keep boot-time RAM lower:
@staticmethod
def _create_panel():
    spi = SPI(pins.LCD_SPI_ID, baudrate=1_000_000, ...)
    from st7305 import ST7305  # defer heavy import
    return ST7305(spi, cs, dc, rst)

def content_area(self):
    y = self.MARGIN + self.HEADER_H + self.CONTENT_GAP
    bottom = self.HEIGHT - self.MARGIN - self.FOOTER_H - self.CONTENT_GAP
    return self.MARGIN, y, self.WIDTH - 2 * self.MARGIN, bottom - y
If you make it through Friday with a filled rectangle and readable text on the display, you've cleared the hardest hurdle.
Saturday morning: structure
Pixels work. Now make the code survivable.
Big firmware projects tend to grow into services/, drivers/, pages/, schedulers, event buses. That's the right shape when you have twelve screens and three I2C sensors.
For a first weekend with a new board, it's overkill.
This project uses a flat layout with just enough separation to read top-to-bottom:
boot.py          → create /data/cache on import
main.py          → entry point, WiFi, fetch loop, build state dict
home.py          → home screen layout (draw only)
chrome.py        → header + footer
wifi.py          → STA connection
weather.py       → Open-Meteo current conditions
wmo.py           → WMO weather code labels
http_client.py   → HTTP client (not network.py — clashes with built-in)
config.py        → load config.json
cache.py         → offline weather cache
clock.py         → NTP sync + date/time labels
battery.py       → ADC battery level
weather_icons.py → WMO weather bitmaps
display.py       → SPI setup + drawing facade
st7305.py        → panel driver (the hard part)
pins.py          → board pin map
text_sizes.py    → font size tokens
sync_device.py   → host-side deploy script (not copied to the board)
The design rules are simple:
main.pyowns the loop - connect WiFi, fetch weather, when to redraw.home.pyonly draws - it receives a plaindictand never touches SPI or HTTP.display.pyhides hardware - pages calldisp.text(), notspi.write().weather.py/wifi.pyfetch - network code never imports drawing modules.
Data flows in one direction: config → fetch → build_state() → render_home() → refresh().
The home page layout
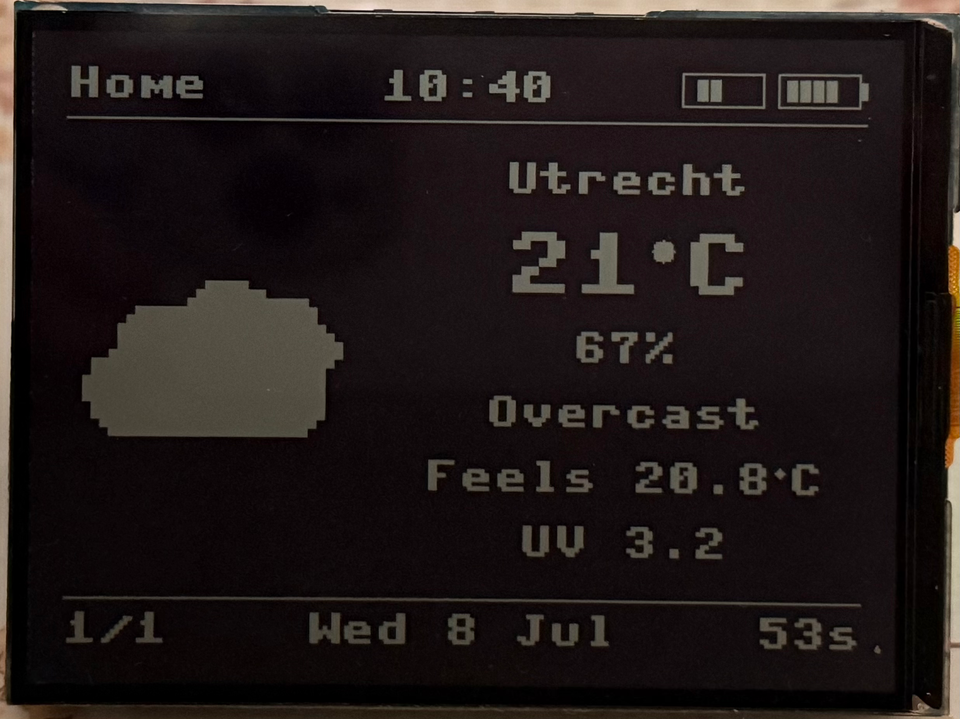
The home screen answers one question: what's it like outside right now?
┌─────────────────────────────────────────┐
│  Header: title · time · wifi · battery  │
├─────────────────────────────────────────┤
│                                         │
│         Home page content               │
│      (icon + location + readings)       │
│                                         │
├─────────────────────────────────────────┤
│  Footer: page · date · last updated     │
└─────────────────────────────────────────┘
Layout is a two-column block centered in the content area:
| Left | Right |
|---|---|
| Weather icon (32×32, scaled 4×) | Location name |
| Large temperature | |
| Humidity % | |
| Condition label | |
| Feels-like (optional) | |
| UV index (optional) |
home.py computes the vertical stack height from whichever fields are present, centers the block between header and footer, and truncates long location names with ....
Weather icons use WMO codes from the API. Temperature is drawn as digits, a small filled circle for the degree sign, then C. The built-in 8×8 font has no ° glyph. Whole numbers look like 23; one decimal otherwise (22.5). Missing data renders as --.
def render_home(disp, state):
    disp.fill(0)
    draw_header(disp, "Home", state.get("time", "--:--"),
                state.get("battery"), state.get("wifi"))

    cx, cy, cw, ch = disp.content_area()
    # ... layout math: icon_x, right_x, y ...
    draw_weather_icon(disp, state.get("weather_code", 3), icon_x, icon_y, scale=4)
    _col_text(disp, state.get("location", ""), right_x, right_w, y, disp.SIZE_MEDIUM)
    _col_temp(disp, state.get("temperature"), right_x, right_w, y, disp.SIZE_XL)
    # ... humidity, condition, feels-like, UV ...

    draw_footer(disp, state.get("page_index", 0), state.get("page_count", 1),
                state.get("date_label", ""), state.get("updated_label", ""))
A dict in, pixels out. chrome.py draws the header (title, clock, WiFi/battery icons, divider) and footer (page counter, date, "Xm ago" label). icons.py supplies segment-style WiFi and battery glyphs plus _blit_mono() for weather icons.
Saturday afternoon: live data
Networking
Config
Copy config.example.json to config.json on the device:
{
  "wifi": { "ssid": "", "password": "" },
  "location": {
    "latitude": 52.0907,
    "longitude": 5.1214,
    "name": "Utrecht"
  },
  "utc_offset_hours": 2,
  "intervals": { "weather_minutes": 10 }
}
Fill in your WiFi credentials before copying to the device.
config.py merges this with defaults. Location name is display-only; lat/lon drive the API URL.
WiFi
wifi.py brings up STA mode (station mode, the board joins your home network as a client, not as an access point), connects with backoff on failure, and exposes status() as {"connected": bool, "level": 1–4} from RSSI, exactly what the header icons expect:
def status(self):
    if not self.is_connected():
        return {"connected": False, "level": 0}
    level = 3
    rssi = self.wlan.status("rssi")
    if rssi >= -55:
        level = 4
    elif rssi >= -65:
        level = 3
    elif rssi >= -75:
        level = 2
    else:
        level = 1
    return {"connected": True, "level": level}
Weather
weather.py calls Open-Meteo with only the current= fields the home page needs:
temperature_2m, relative_humidity_2m, apparent_temperature, weather_code, uv_index
The WMO weather_code maps to a human label via wmo.py and to a bitmap via weather_icons.py. Successful fetches are saved to /data/cache/weather_current.json so a failed refetch still shows the last good reading.
def _url(self):
lat, lon = self._loc()
params = (
"latitude={}&longitude={}"
"¤t=temperature_2m,relative_humidity_2m,apparent_temperature,"
"weather_code,uv_index"
"&timezone=auto"
).format(lat, lon)
return _BASE + "?" + params
def fetch(self):
raw = http_client.get_json(self._url())
self._current = self._parse(raw)
cache.save("weather_current", self._current)
http_client.py handles the HTTP side, retries, gc.collect(), HTTPS→HTTP fallback, and always closes the response:
def _attempt_get(url, timeout):
    resp = requests.get(url, timeout=timeout)
    try:
        if resp.status_code != 200:
            raise OSError("HTTP " + str(resp.status_code))
        return resp.json()
    finally:
        resp.close()  # urequests leaks RAM if you skip this
Main loop
main.py does the following on startup:
- Load config
- Init display
- Connect WiFi
- NTP sync (if online)
- Fetch weather
- Enter loop: refetch every 10 minutes, redraw every minute (clock + battery), reconnect WiFi if dropped
build_state() assembles the dict home.py expects, no global variables, no context object: