
Have you ever looked at a smart home dashboard and thought, “I could build this myself”? That itch to tinker, to understand what’s really going on behind the scenes, is what pulled me into building my own home monitoring setup from scratch.
I wanted a simple way to collect real environmental data using my own sensors, my own hardware, and my own code; no cloud dependency, no black boxes. So I started small. Using an ESP32-C3 SuperMini and a humble DHT11 temperature and humidity sensor, I built a tiny Wi-Fi-enabled node that reports real-time readings over serial and serves them through a minimal web interface.
This article is a follow-up to Getting Started with ESP32-C3 SuperMini and MicroPython. We’ll extend that foundation by adding a DHT11 sensor, reading data via GPIO, and exposing those readings both in the serial console and on a lightweight web server running directly on the ESP32.
By the end of this guide, you’ll know how to:
- Wire a DHT11 to the ESP32-C3 SuperMini
- Read temperature and humidity values using MicroPython
- View live sensor data in the REPL / Serial Monitor
- Run a tiny built-in web server for real-time readings
- Use this setup as a building block for a DIY home-automation system
What You Need
To start, you will need some hardware components:
| Item | Notes |
|---|---|
| ESP32-C3 SuperMini board | with MicroPython installed (see the previous article) |
| DHT11 temperature & humidity sensor module | digital single-wire sensor |
| Female-to-female Dupont connectors | for direct pin-to-pin connections |
| USB-C cable | for power and serial communication |
Buying through these affiliate links helps keep this blog running and the projects coming. Thanks for the support!
Hardware Wiring & Pin Diagram
Here’s how to wire the ESP32-C3 SuperMini directly to the DHT11 sensor module:
 ESP32-C3 SuperMini     DHT11 Sensor
 ───────────────        ─────────────
 3V3  ─────────────►    VCC
 GND  ─────────────►    GND
 GPIO5 ────────────►    DATA
All connections are made pin-to-pin using female-to-female Dupont connectors, no breadboard or additional components required.
On the ESP32-C3 Super Mini you connect like this:
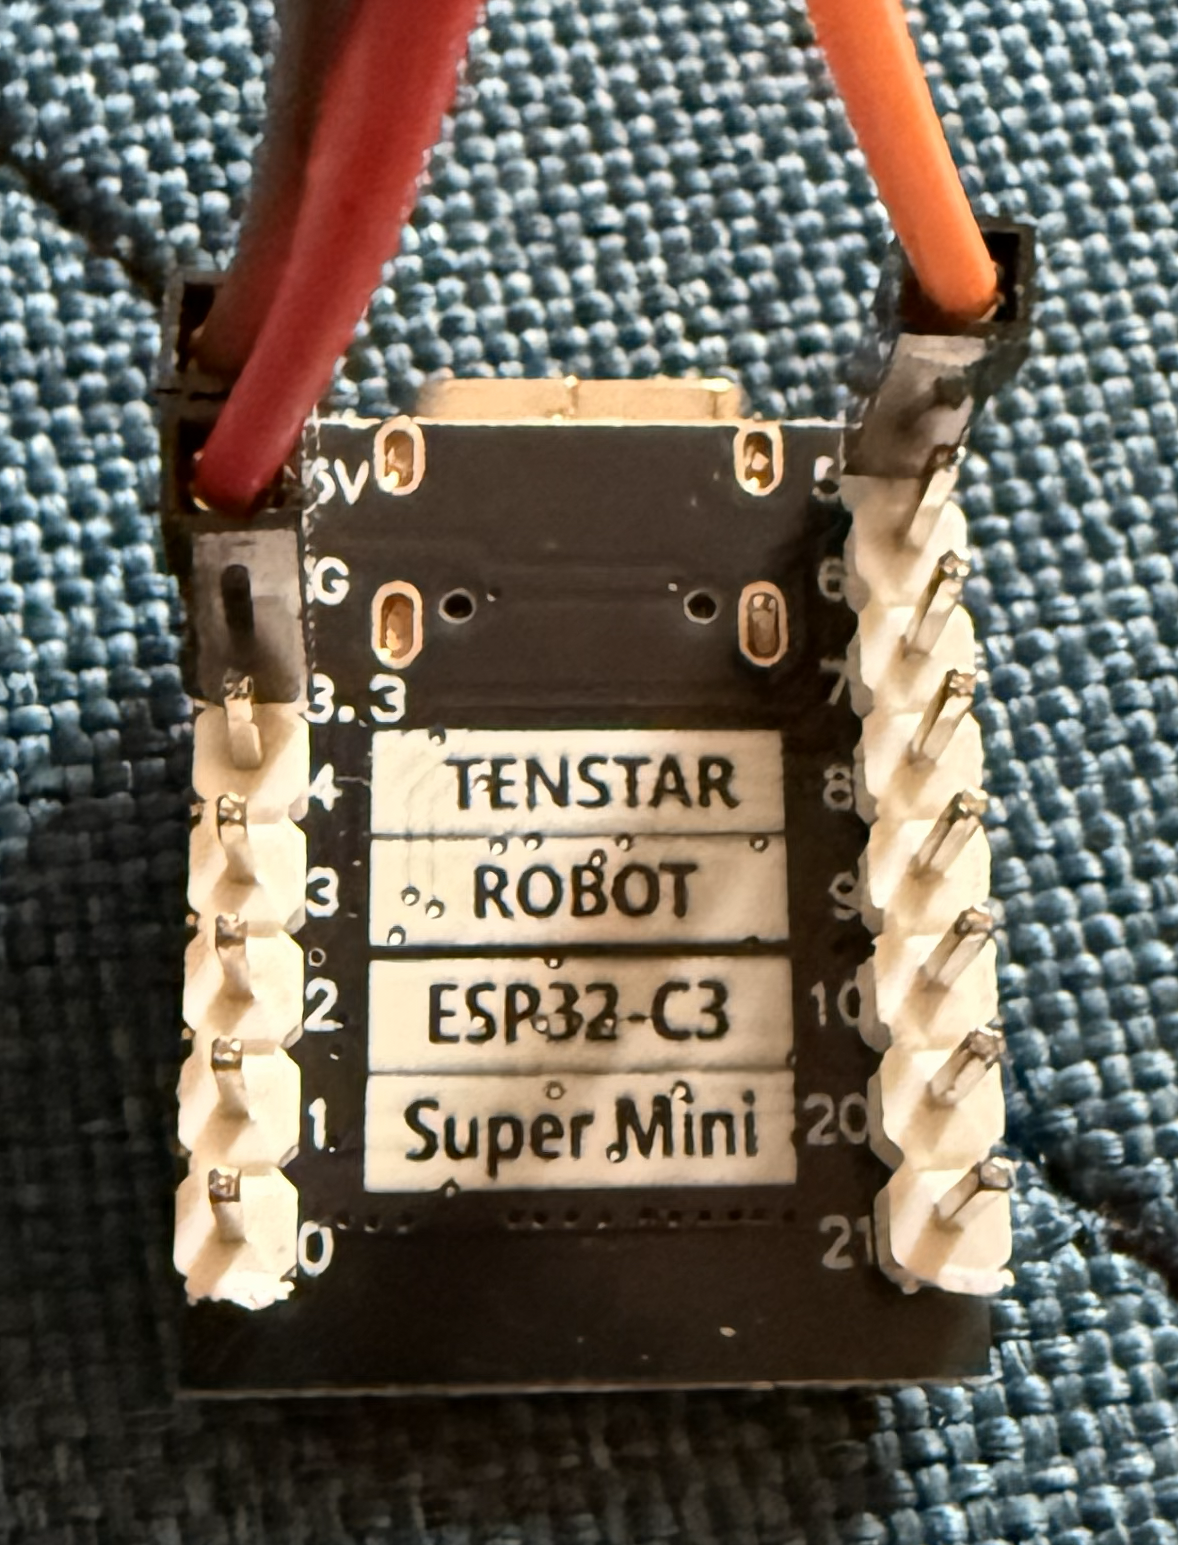
You can see the red wire connected to 3.3V, the brown wire connected to GND and the orange connected to the PIN5 on the ESP32.
For the sensor, you connect like this:
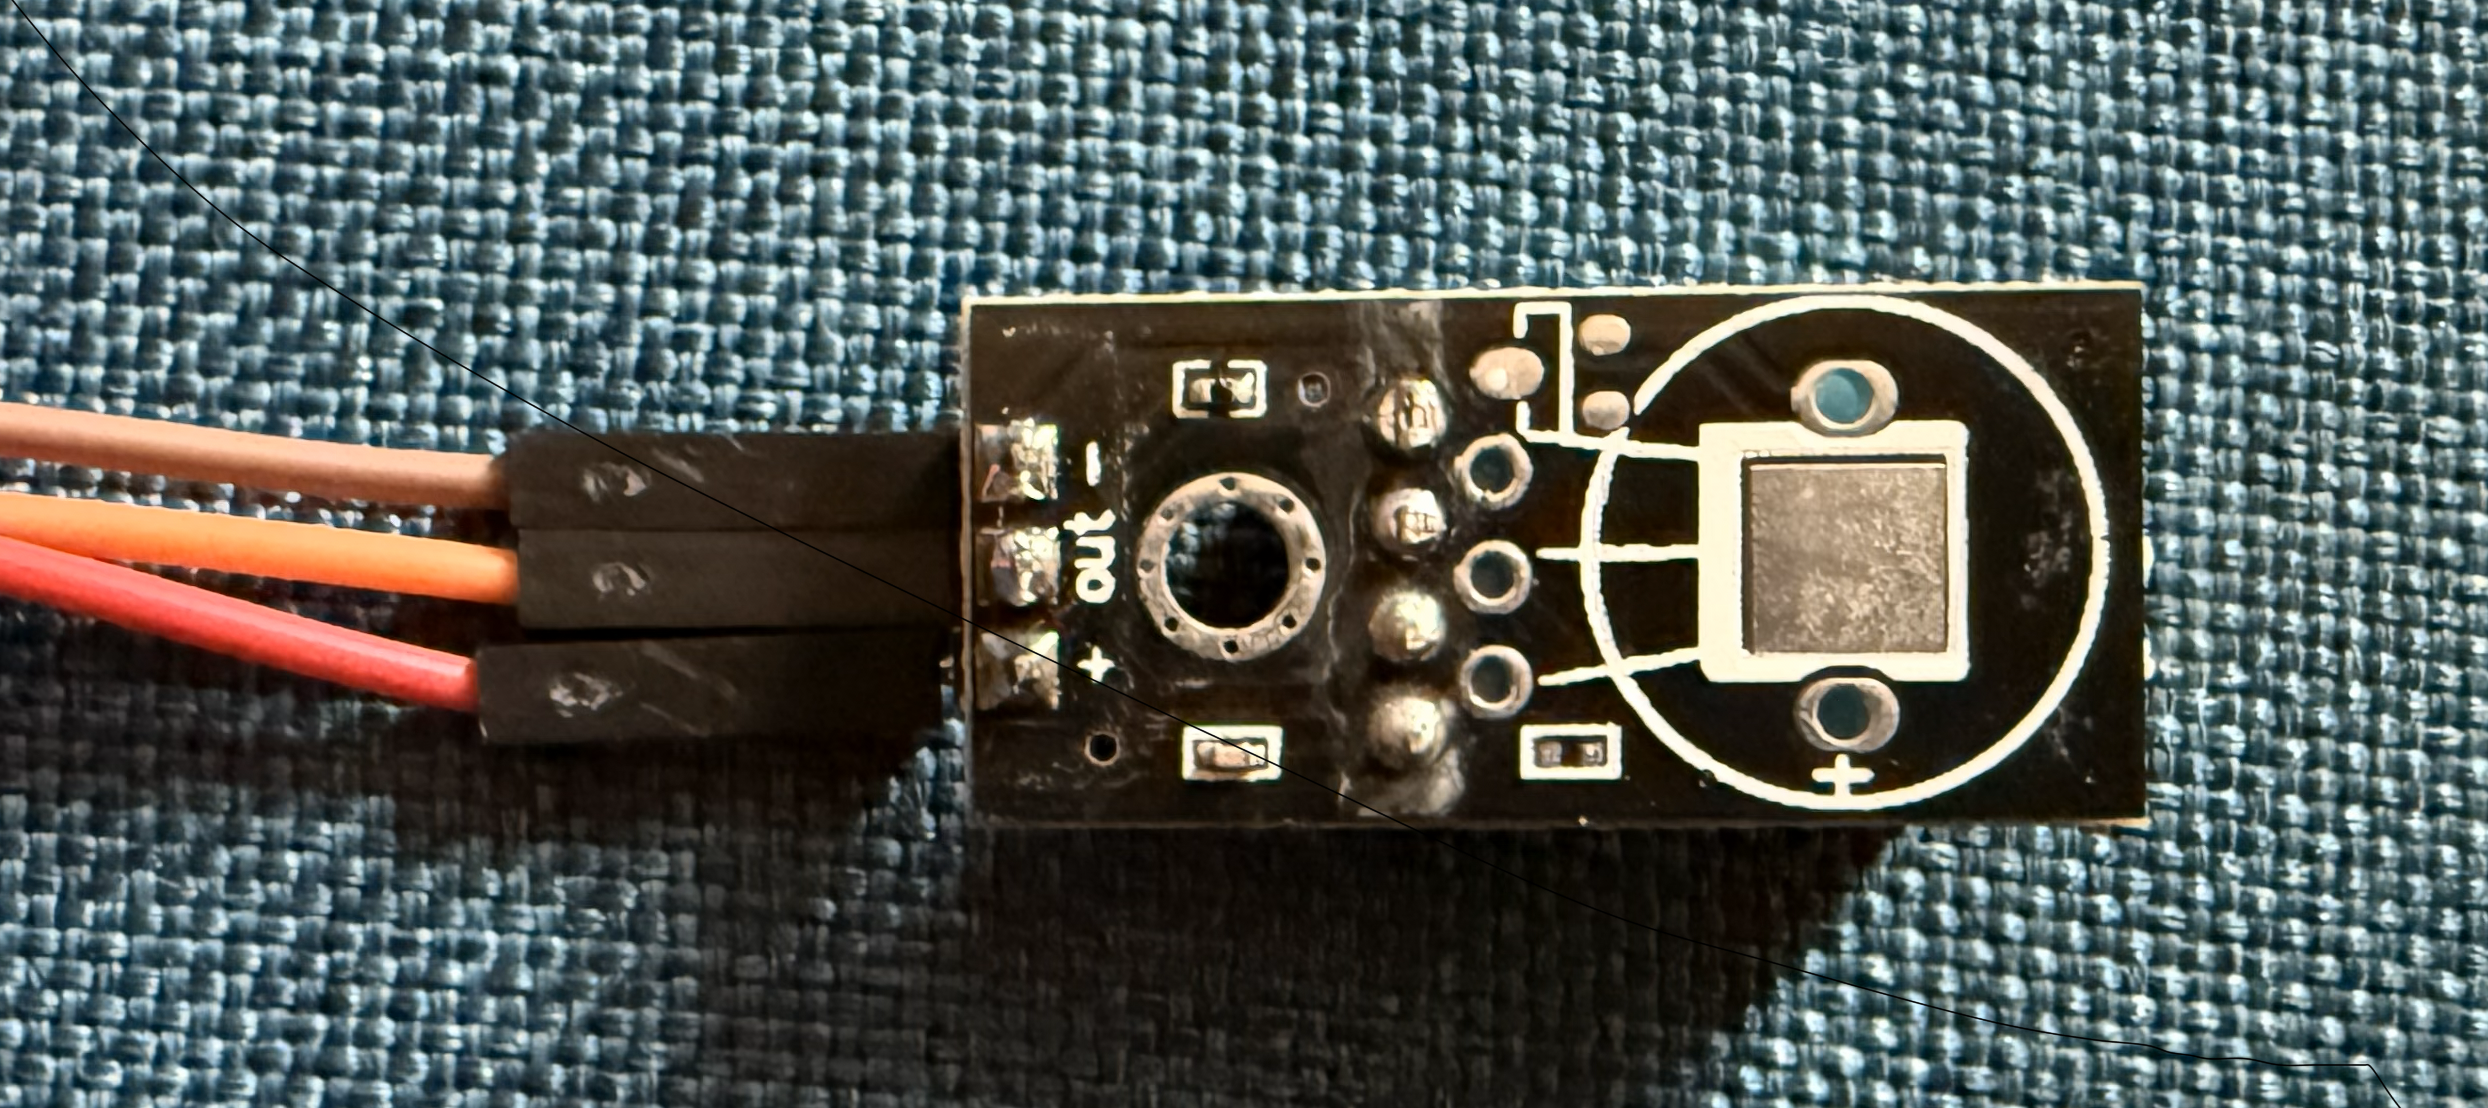
You can see the red wire connected to '+', the brown wire connected to '-' and the orange connected to 'out'.
That’s it, three wires total.
Why GPIO5?
GPIO5 is a regular, general-purpose I/O pin that works well for digital sensors like the DHT11. You can use other free GPIOs if needed, but it’s best to avoid pins with special boot or flashing functions. GPIO5 is a safe and convenient default.
Reading the DHT11 in MicroPython (Serial Output)
Before building the web server, let's start with a simple script to verify your sensor is working correctly. This will help you troubleshoot any wiring issues early.
The dht module is included in most MicroPython builds for ESP32, but if you encounter an import error, you may need to install it.
Step 1: Create the Sensor Reading Script
In Thonny or your preferred editor, save this as dht_read.py:
import time
import machine
import dht

sensor_pin = machine.Pin(5)
sensor = dht.DHT11(sensor_pin)

print("Starting DHT11 sensor readings...")
print("Press Ctrl+C to stop\n")

while True:
    try:
        # DHT11 needs at least 2 seconds between readings
        time.sleep(2)

        # Trigger a measurement
        sensor.measure()

        # Read the values
        temp = sensor.temperature()
        hum = sensor.humidity()

        # Print formatted output
        print(f"Temperature: {temp}°C   Humidity: {hum}%")

    except Exception as e:
        print(f"Read error: {e}")
        print("Check your wiring and pull-up resistor!")
Step 2: Upload and Run
- Upload the file to your ESP32-C3 SuperMini using Thonny (File → Save As → MicroPython device).
- Open the Serial Monitor (View → Shell in Thonny).
- Run the script by pressing F5 or clicking Run.
You should see an output like this:
Starting DHT11 sensor readings...
Press Ctrl+C to stop

Temperature: 21°C   Humidity: 34%
Temperature: 21°C   Humidity: 34%
Temperature: 21°C   Humidity: 34%
Temperature: 21°C   Humidity: 34%
Temperature: 21°C   Humidity: 34%
...
Understanding the Output:
- Temperature is in Celsius (you can convert to Fahrenheit:
(temp * 9/5) + 32) - Humidity is a percentage (0-100%)
- The DHT11 has ±2°C accuracy for temperature and ±5% for humidity
- Readings update every 2 seconds (the sensor's minimum interval)
Important: The DHT11 can only update about every 2 seconds, so keep your loop delay ≥ 2 seconds. Reading faster than this will cause errors or return stale data.
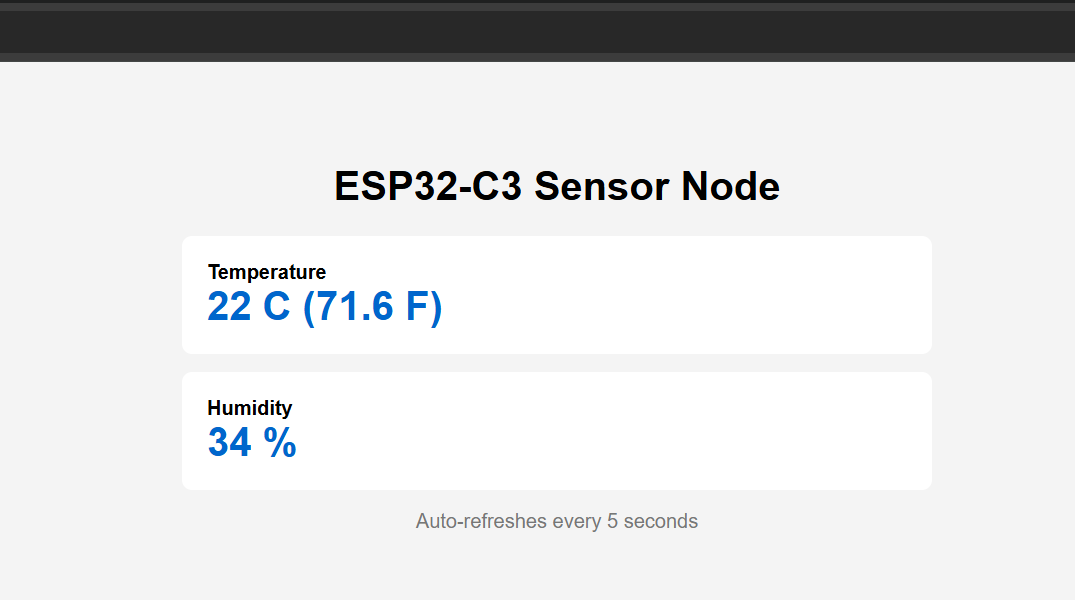
Running a Simple Web Server
Now that you know the DHT11 is working, it’s time to expose those readings over the network. This is where the project really starts to feel like a building block for your own Home Assistant–style system.
You’ll connect the ESP32-C3 SuperMini to Wi-Fi and run a tiny web server that serves the latest temperature and humidity readings to any browser on your local network; no external services, no cloud required.
Step 1: Create the Web Server Script
This script combines Wi-Fi connectivity, sensor readings, and a basic HTTP server. Save it as main.py, MicroPython automatically runs this file on boot.
This article is for subscribers only
To continue reading this article, just register your email and we will send you access.
Subscribe NowAlready have an account? Sign In