Getting Started with Pyglet: A Cross-Platform Windowing and Multimedia Library for Python

Pyglet is a powerful, yet easy-to-use, cross-platform windowing and multimedia library for Python. It provides developers with a simple API for creating windows, handling user input, and working with graphics, audio, and video. One of the key features of Pyglet is its ability to run on multiple platforms, including Windows, MacOS, and Linux, without requiring any platform-specific code.
Pyglet is well-suited for various applications, from simple scripting tasks to full-fledged game development. Its lightweight design and minimal dependencies make it an ideal choice for projects that need to run on low-power or embedded devices. Additionally, Pyglet's support for OpenGL and other advanced graphics features makes it a great choice for creating visually stunning applications.
In this article, we will explore the main features and capabilities of Pyglet, and provide examples and code snippets to help you get started with this versatile library. Whether you're a seasoned Python developer or just starting out, Pyglet is a valuable tool to have in your toolkit.
You can also follow along this article in a video format:
YouTube Video
Installation and Setup
The easiest way to install Pyglet is to use pip, the Python package manager. Open a command prompt and enter the following command:
pip install pyglet
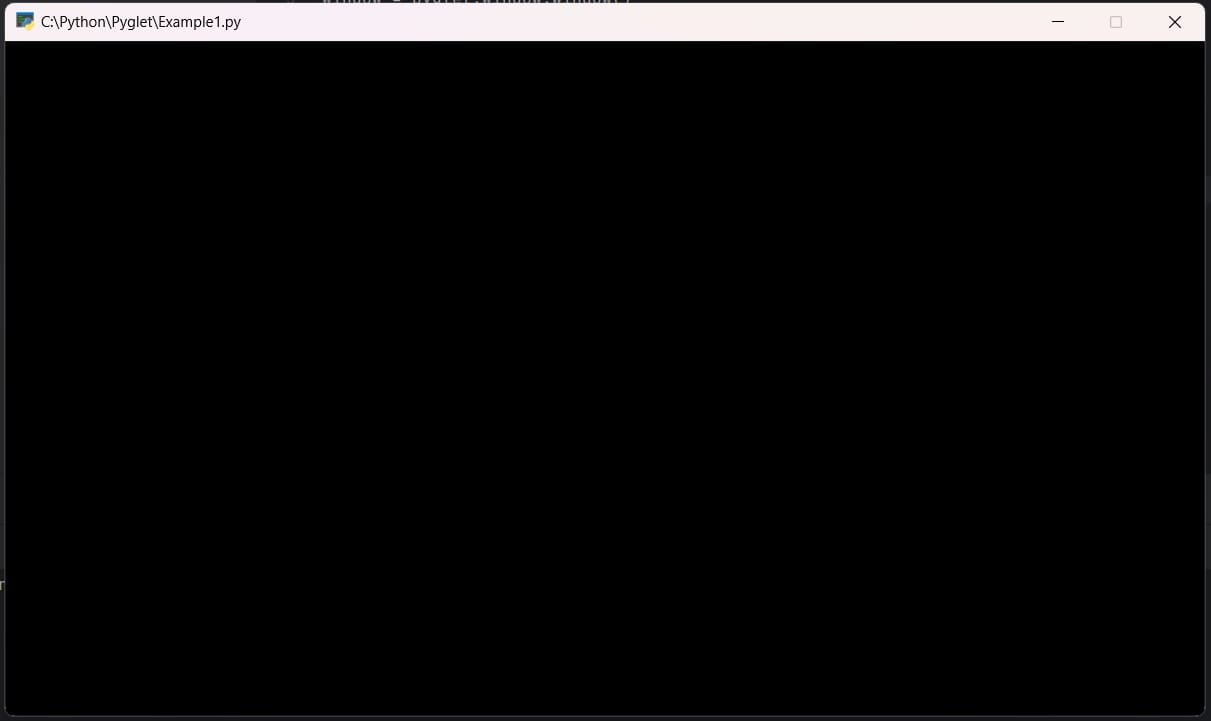
Once Pyglet is installed, you can verify that it's working correctly by running a simple test script. Here's an example:
import pyglet

window = pyglet.window.Window()

@window.event
def on_draw():
    window.clear()

pyglet.app.run()
This script creates a basic window and clears the screen whenever it's redrawn. If Pyglet is installed correctly, you should see a blank window when you run the script:
The NextJS boilerplate with all you need to build your SaaS, AI tool, blog, or any other web app. From idea to production in 5 minutes.
Basic Windowing
Creating a basic window in Pyglet is simple and straightforward. In this chapter, we will cover the basics of window creation and event handling.
To create a window in Pyglet, you first need to import the pyglet module and the window class. Then, you can create a new window object and specify its size and title. Here's an example:
import pyglet

window = pyglet.window.Window(width=800, height=600)
This creates a window that's 800 pixels wide and 600 pixels tall.
In Pyglet, events are handled using decorators. To handle an event, you define a function and decorate it with the appropriate event decorator.
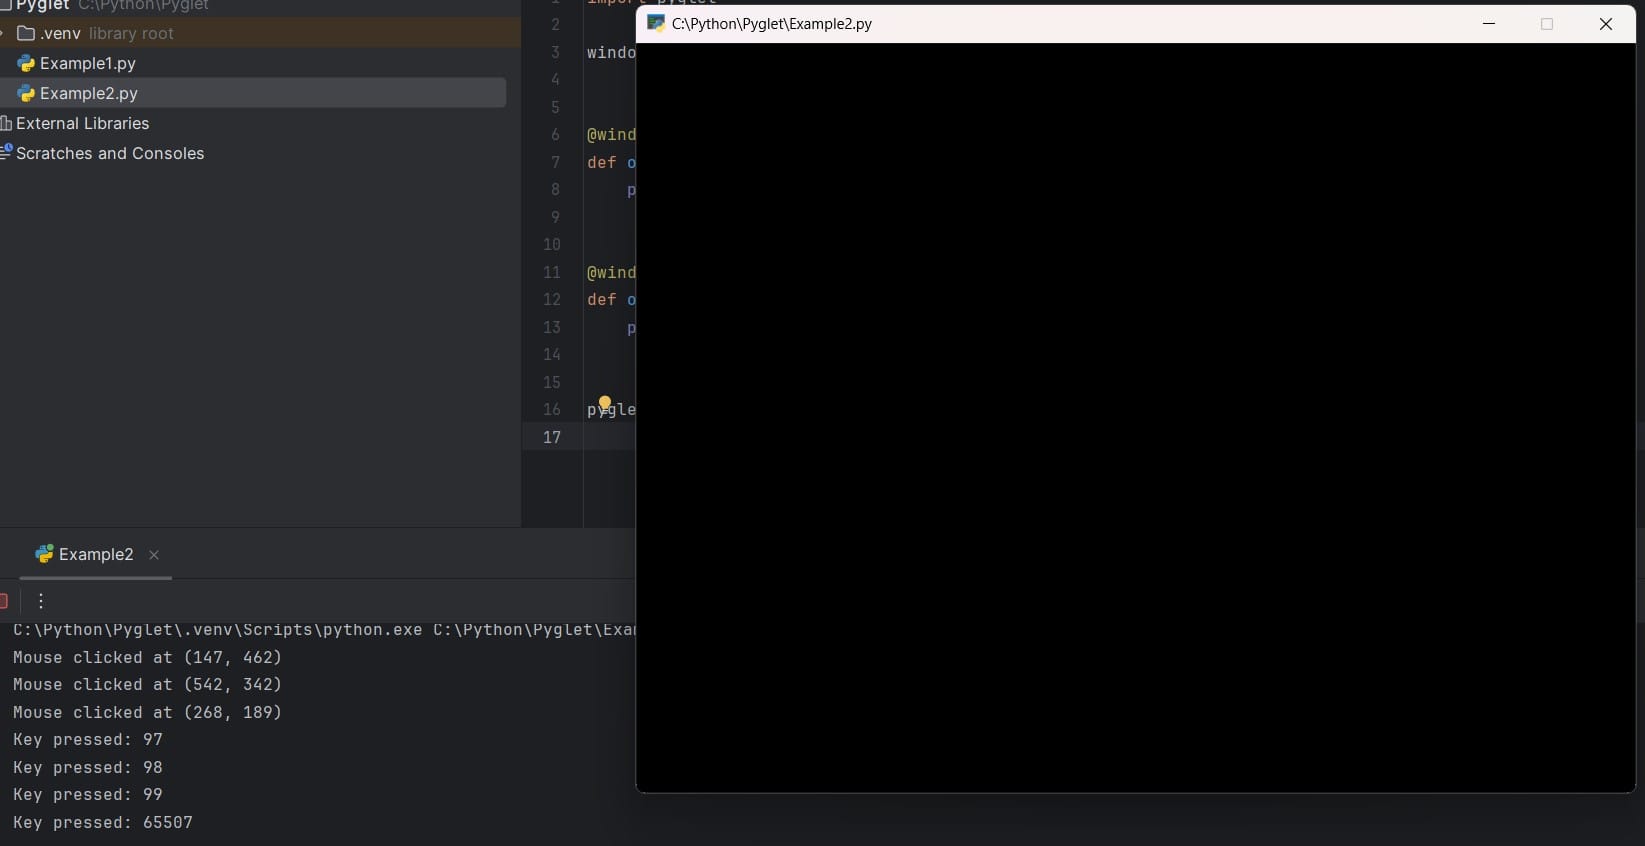
For example, to handle mouse clicks, you can define a function and decorate it with @window.event. Here's an example:
@window.event
def on_mouse_press(x, y, button, modifiers):
    print(f"Mouse clicked at ({x}, {y})")
This function will be called whenever the user clicks the mouse in the window. The x and y parameters give the position of the click, and the button parameter gives the mouse button that was clicked (1 for left, 2 for right, etc.).
Similarly, you can handle other events such as key presses, window resizing, and more. Here's an example that handles key presses:
@window.event
def on_key_press(symbol, modifiers):
    print(f"Key pressed: {symbol}")
Remember to call pyglet.app.run() at the end of your script to start the event loop and display the window.
pyglet.app.run()
With just a few lines of code, you now have a basic window that can handle user input:
Graphics and Drawing
Pyglet provides a powerful graphics module that allows you to draw shapes, images, and text in your window. In this chapter, we'll cover the basics of drawing graphics in Pyglet.
Shapes
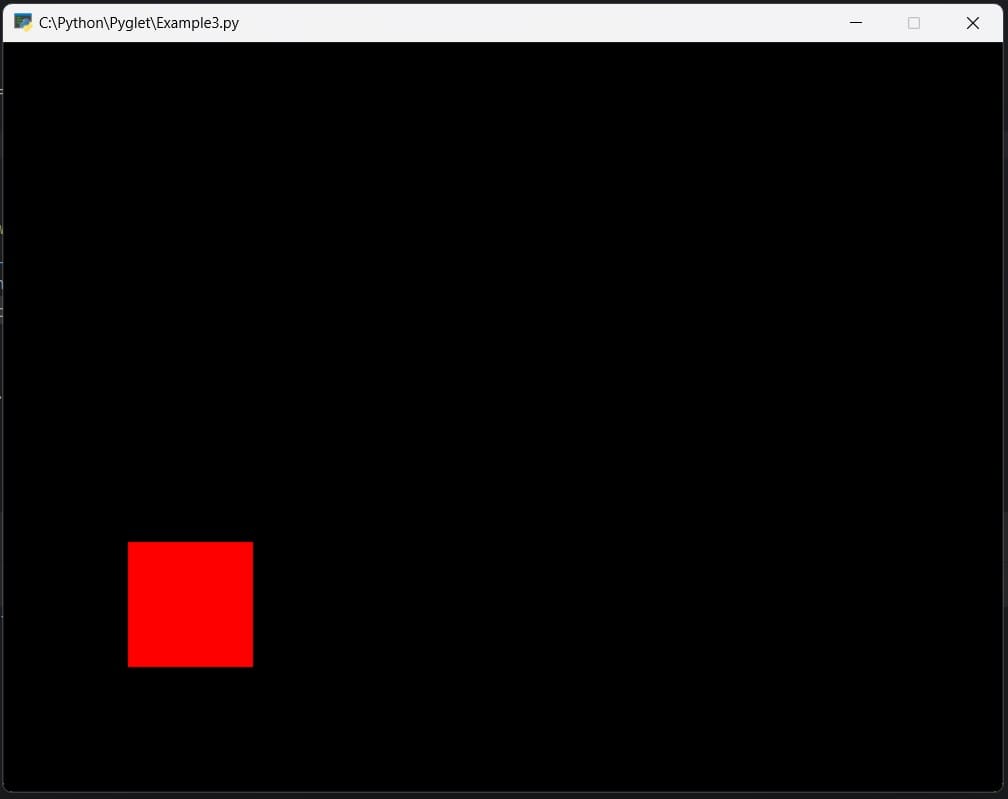
To draw shapes in Pyglet, you first need to create a pyglet.graphics.Batch object. This object acts as a container for all the shapes you want to draw. Here's an example:
batch = pyglet.graphics.Batch()
Once you have a batch object, you can create shapes and add them to the batch. For example, to draw a red square, you can use the pyglet.shapes.Rectangle class:
square = pyglet.shapes.Rectangle(x=100, y=100, width=100, height=100, color=(255, 0, 0), batch=batch)This creates a square that's 100 pixels wide and 100 pixels tall, located at (100, 100), and colored red.
To draw the shapes in the batch, you need to call the draw method in the on_draw event handler:
@window.event
def on_draw():
    window.clear()
    batch.draw()
This clears the window and draws all the shapes in the batch:
Images
To draw an image in Pyglet, you first need to load the image using the pyglet.image.load function. Then, you can create a pyglet.sprite.Sprite object and add it to the batch. Here's an example: